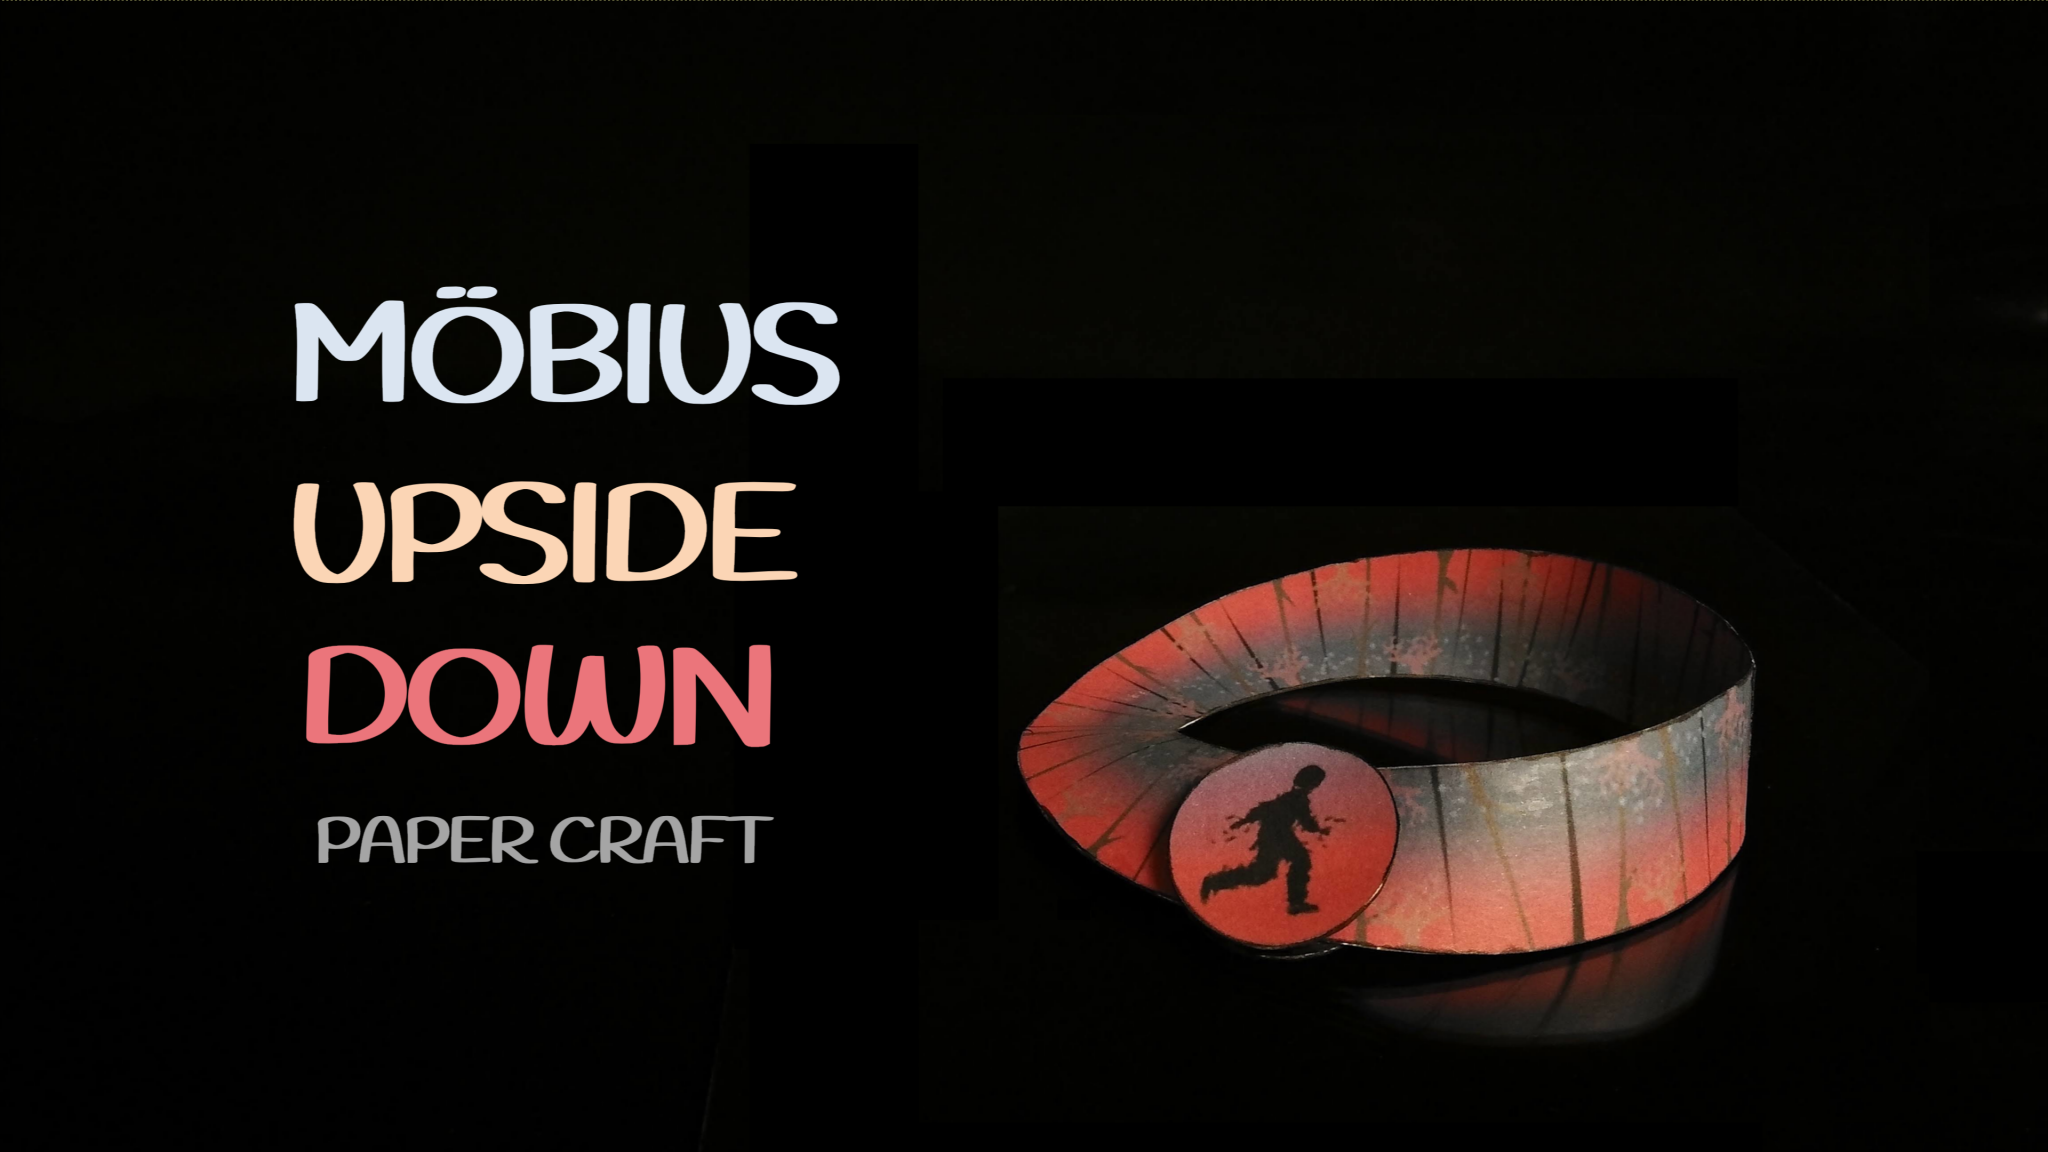
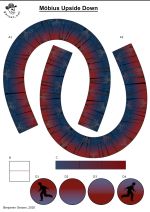
I recently found this video on instagram: an arrow moves along a Möbius strip, changing its direction of the pointer with each turn. In the video, the model is printed on a 3-D printer, and I wanted to replicate it in paper. I replaced the arrow with a running silhouette.
If you roll the ribbon into a rectangle of ordinary office paper, the result will be unsightly, amorphous and short-lived. A beautiful ring, as in the photo above, was developed with the help of the 3-D editor Blender, the template for printing was created in the editor Gimp.
Download, print and start assembling, with the help of video or photo instructions.
Video tutorial
VIDEO
Photo tutorial
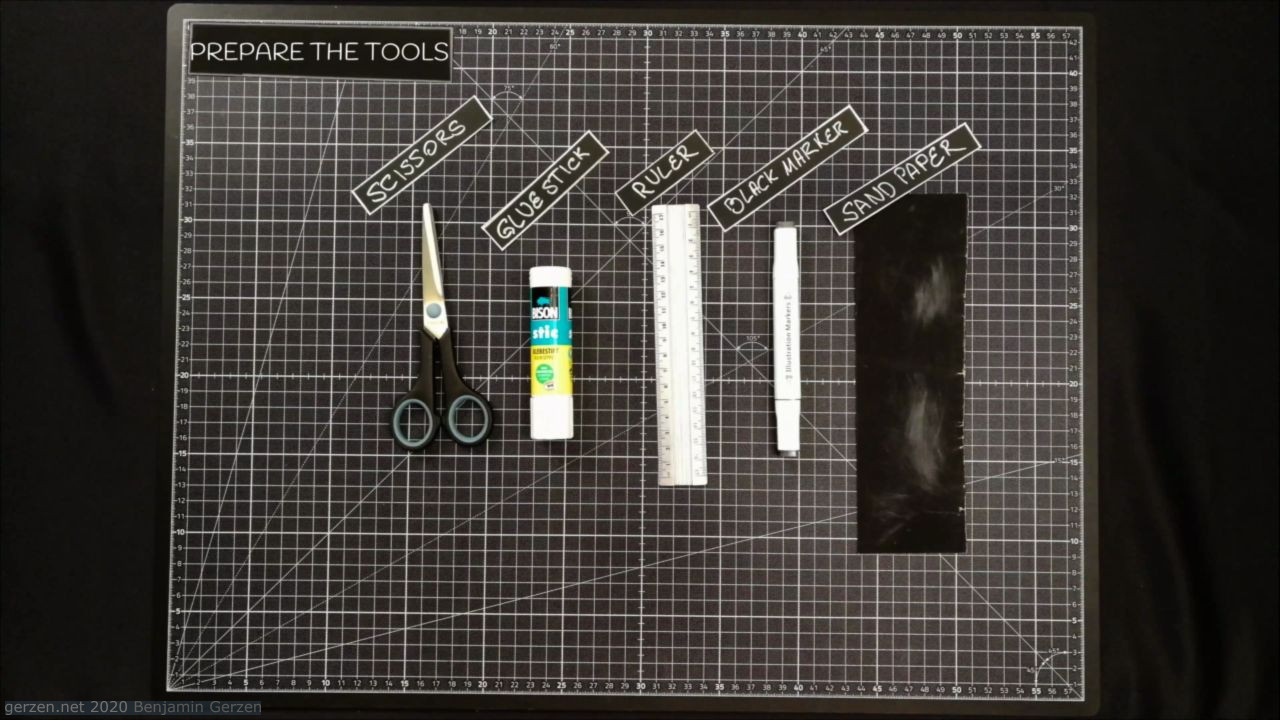
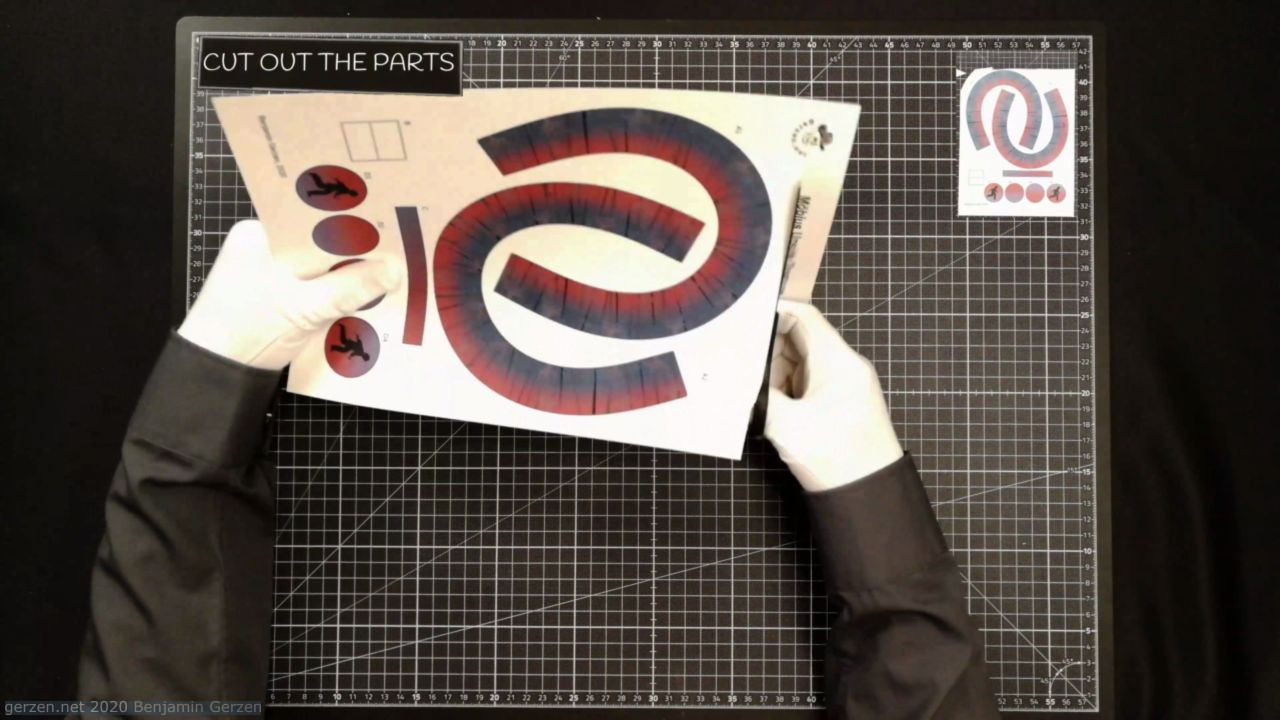
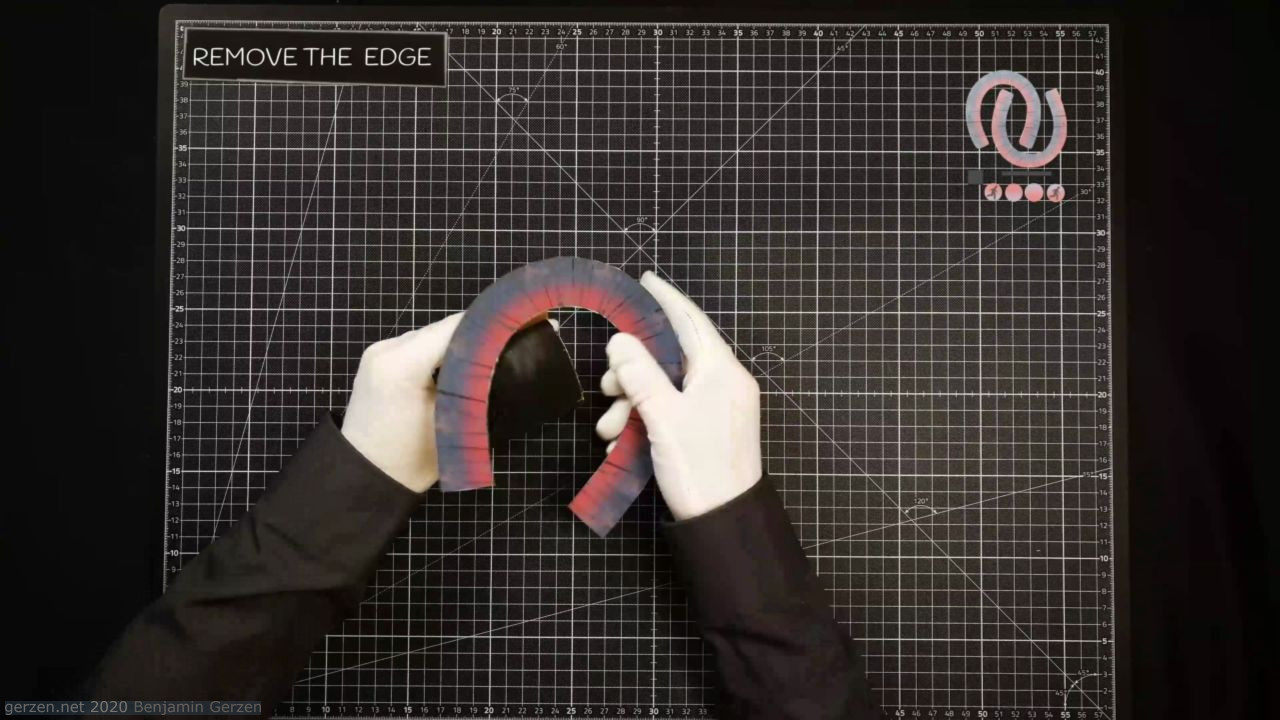
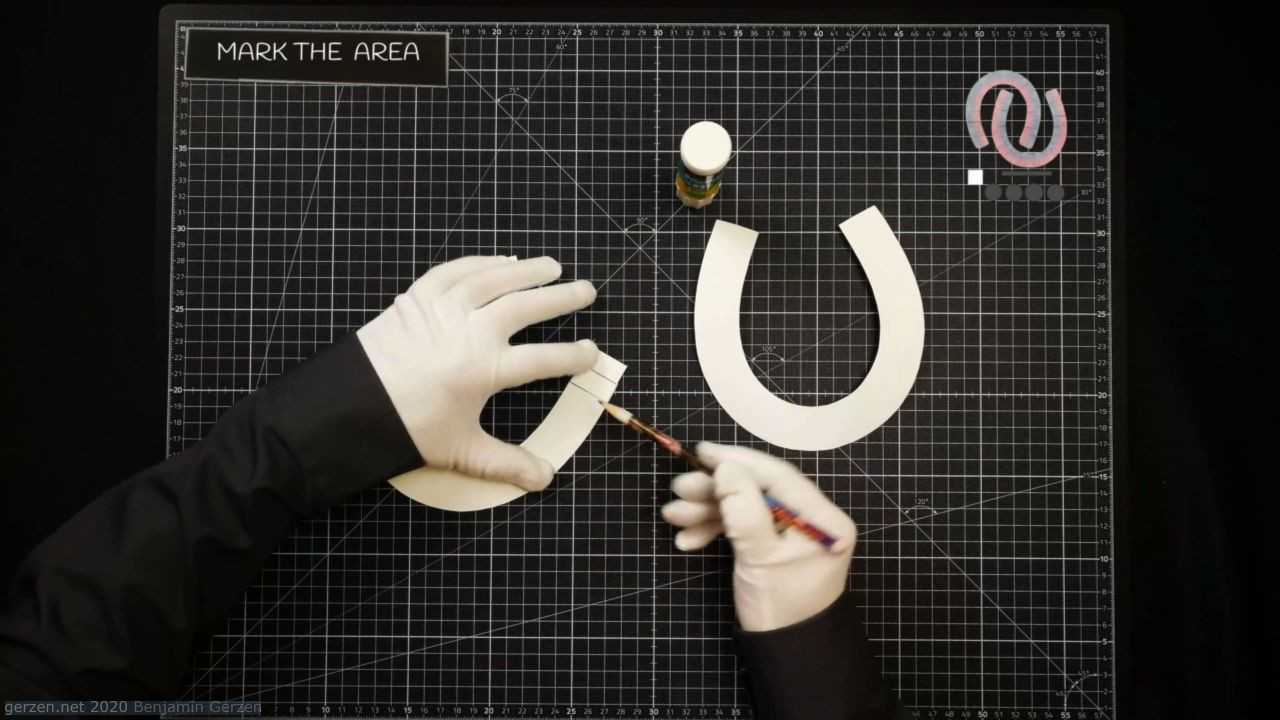
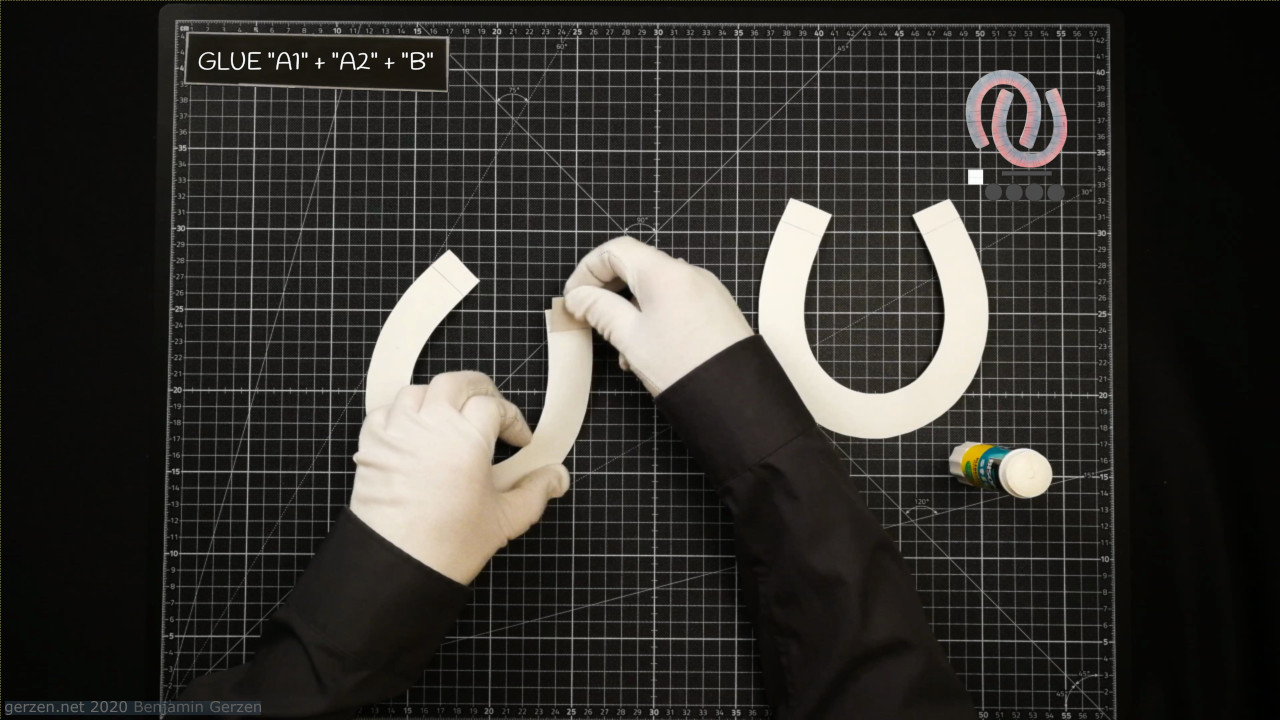
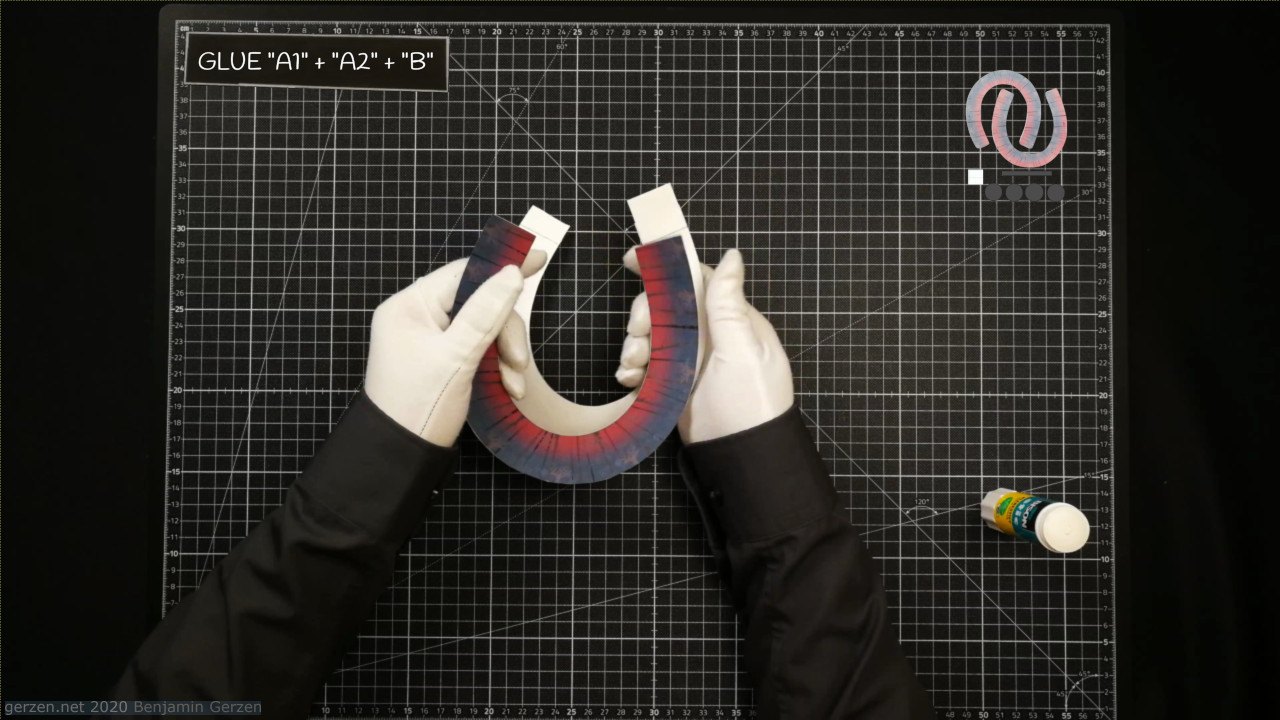
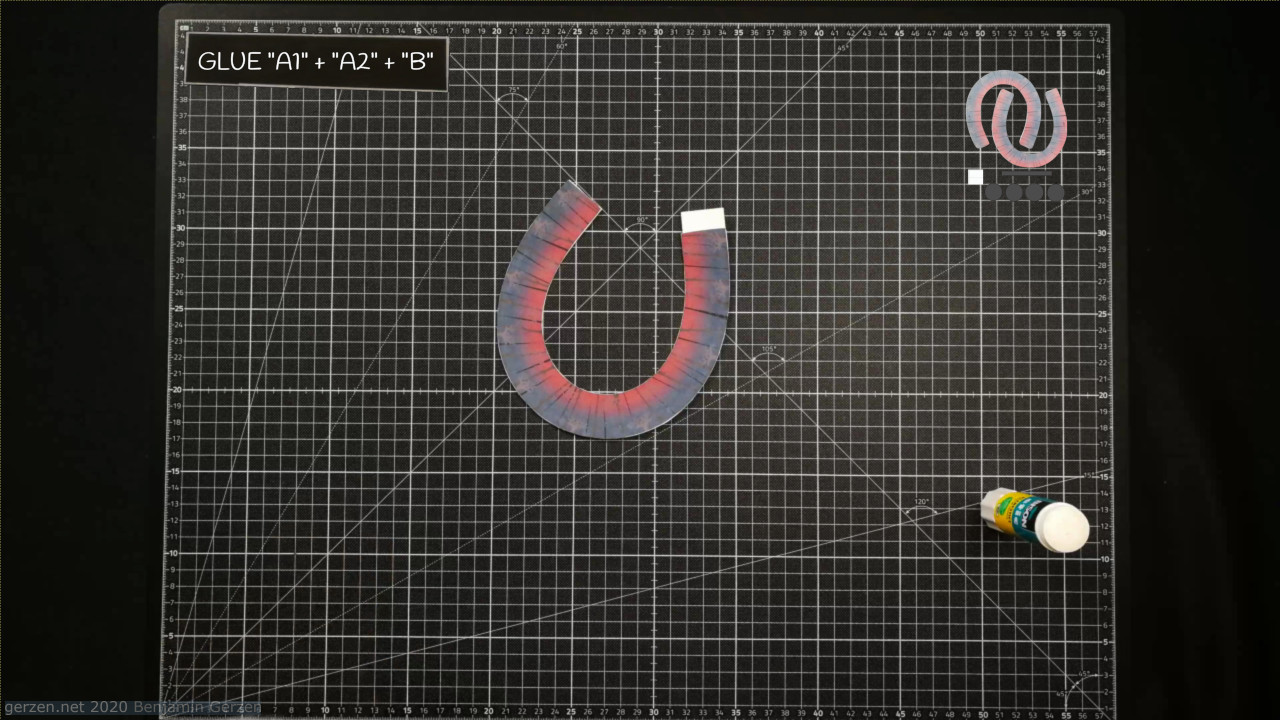
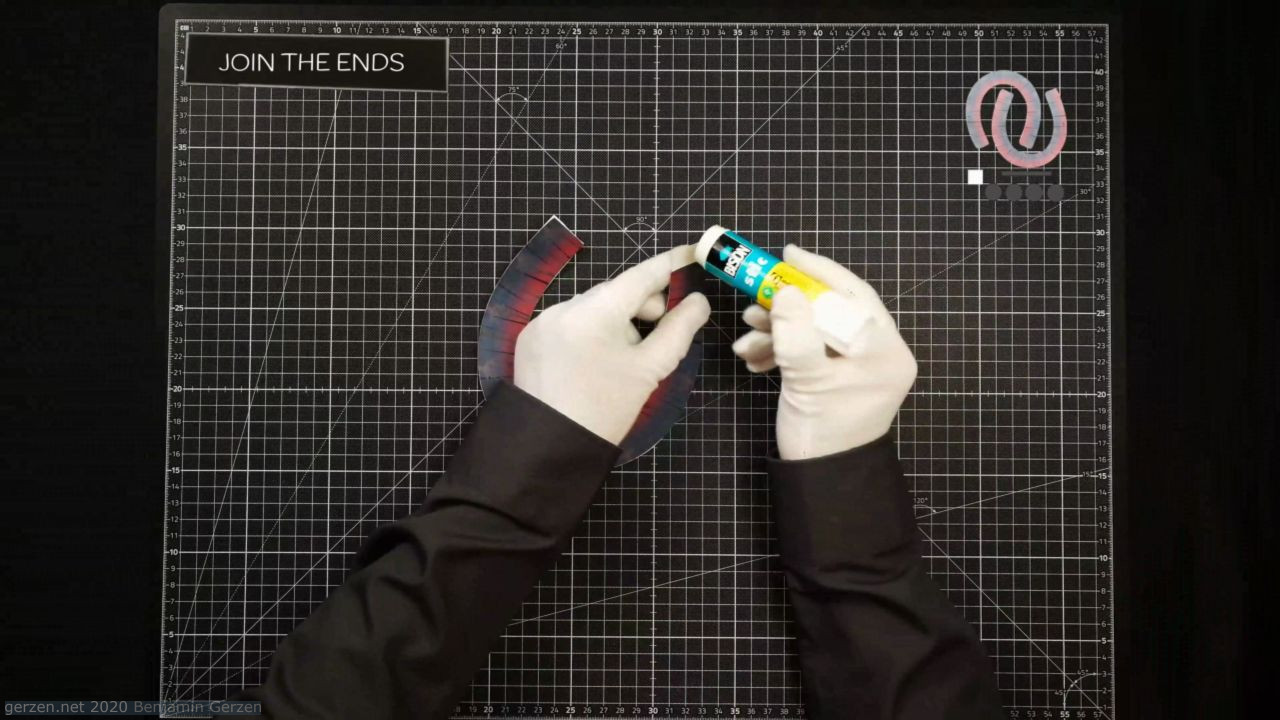
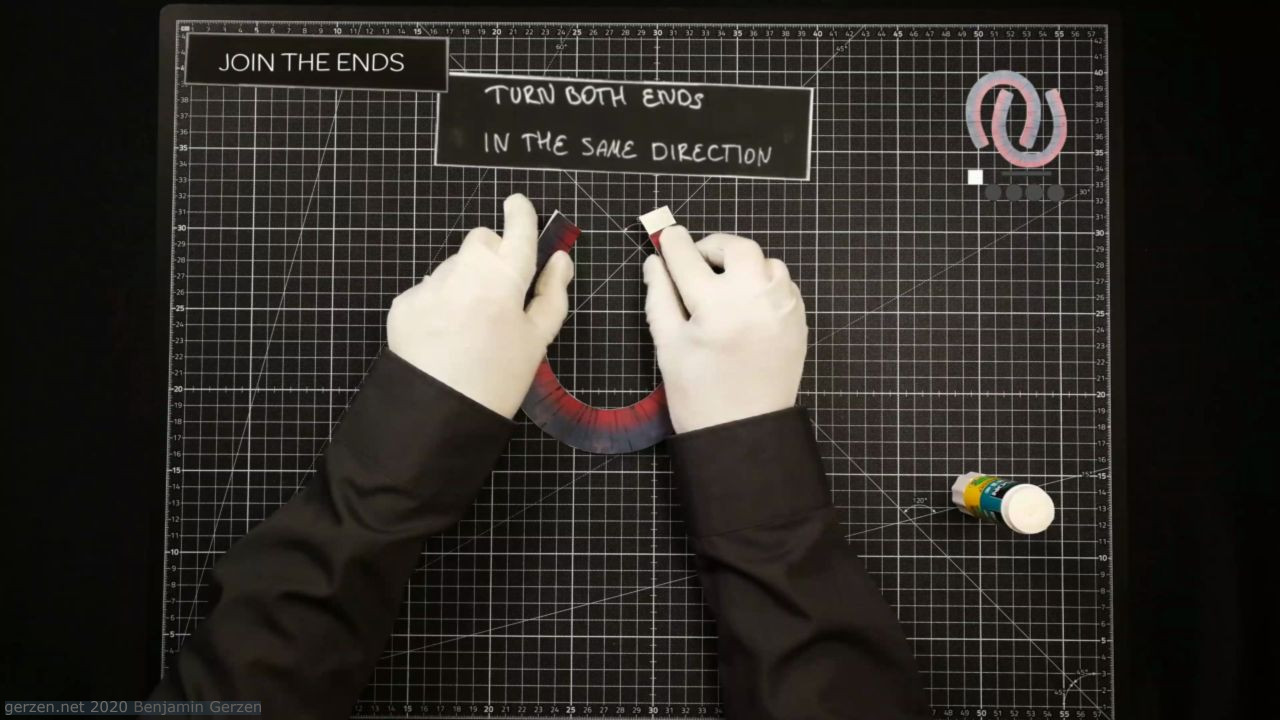
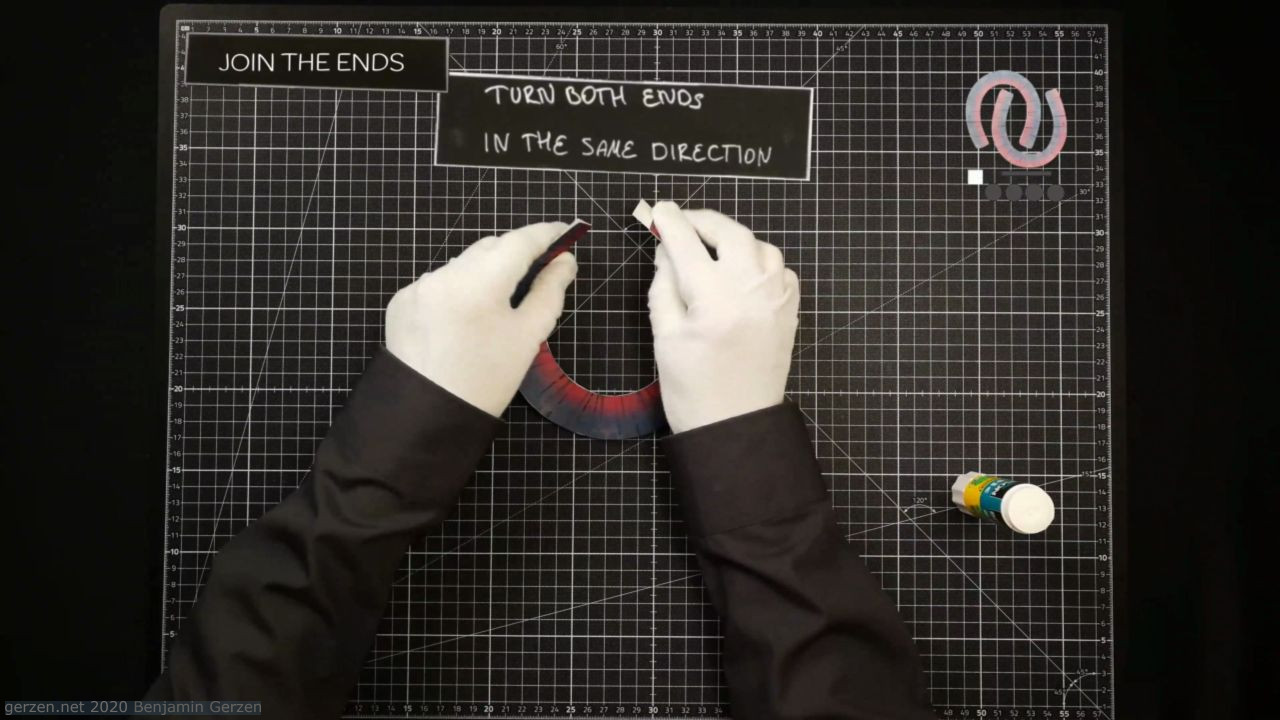
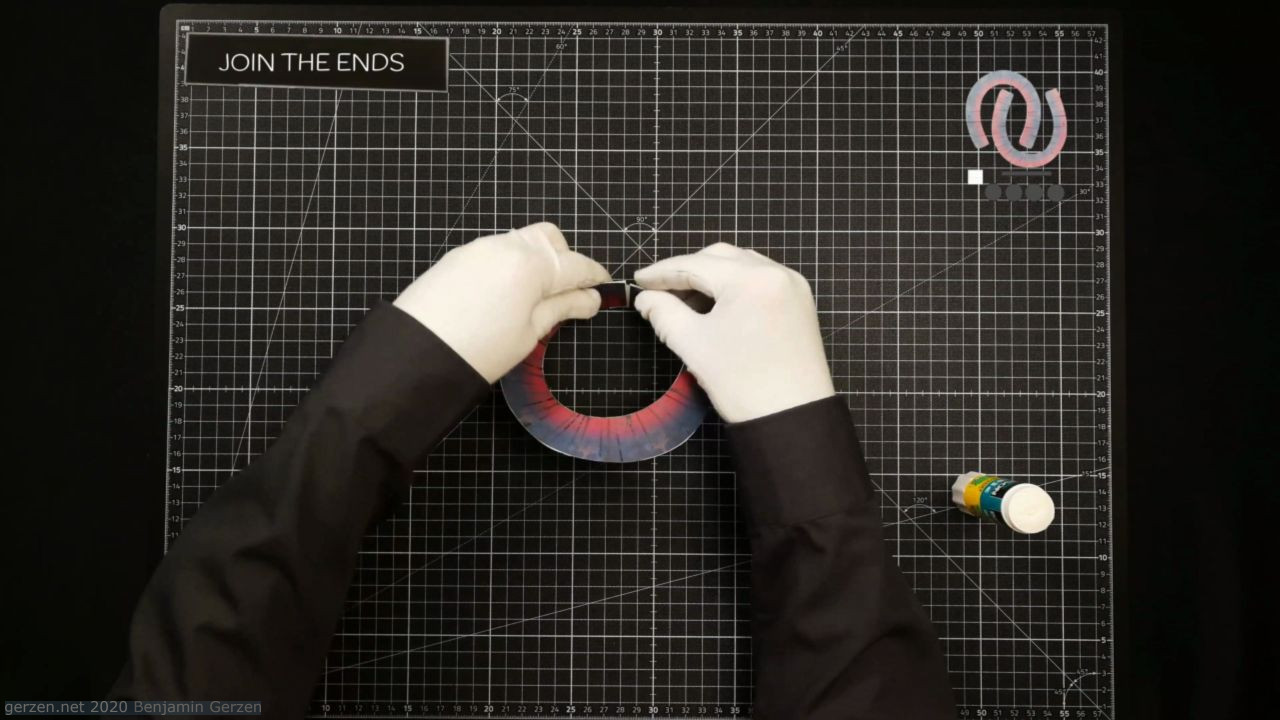
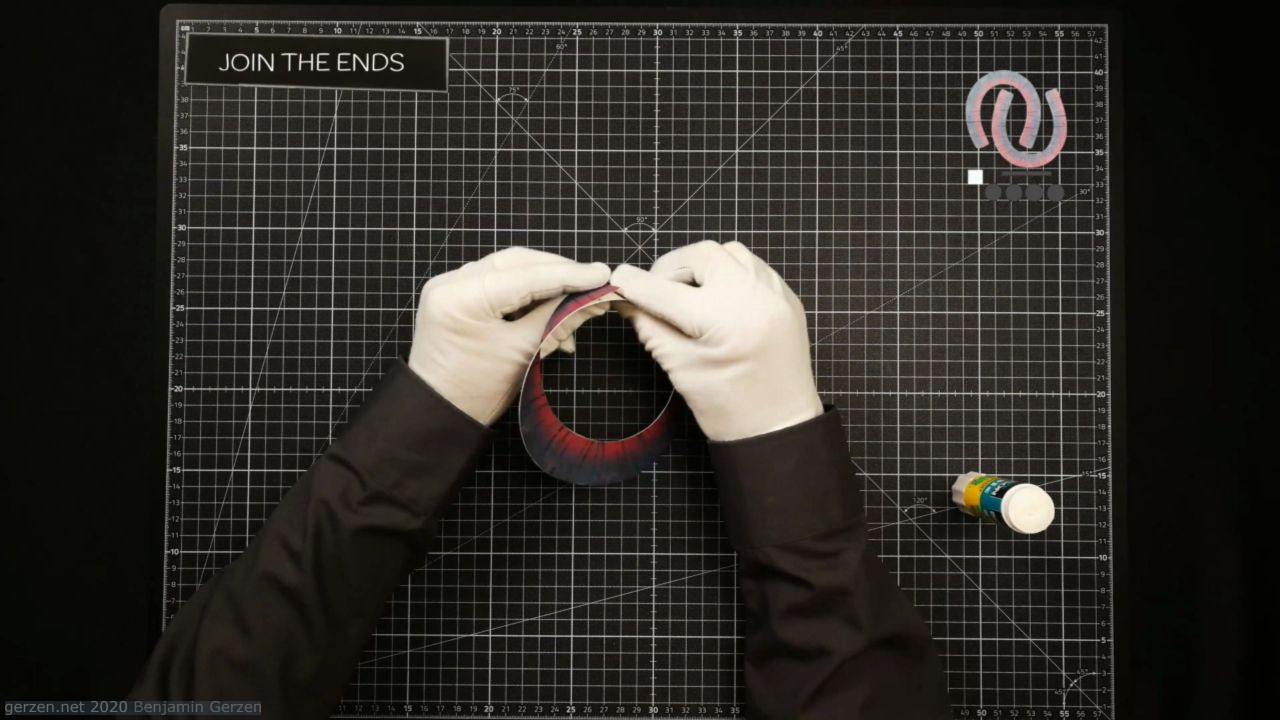
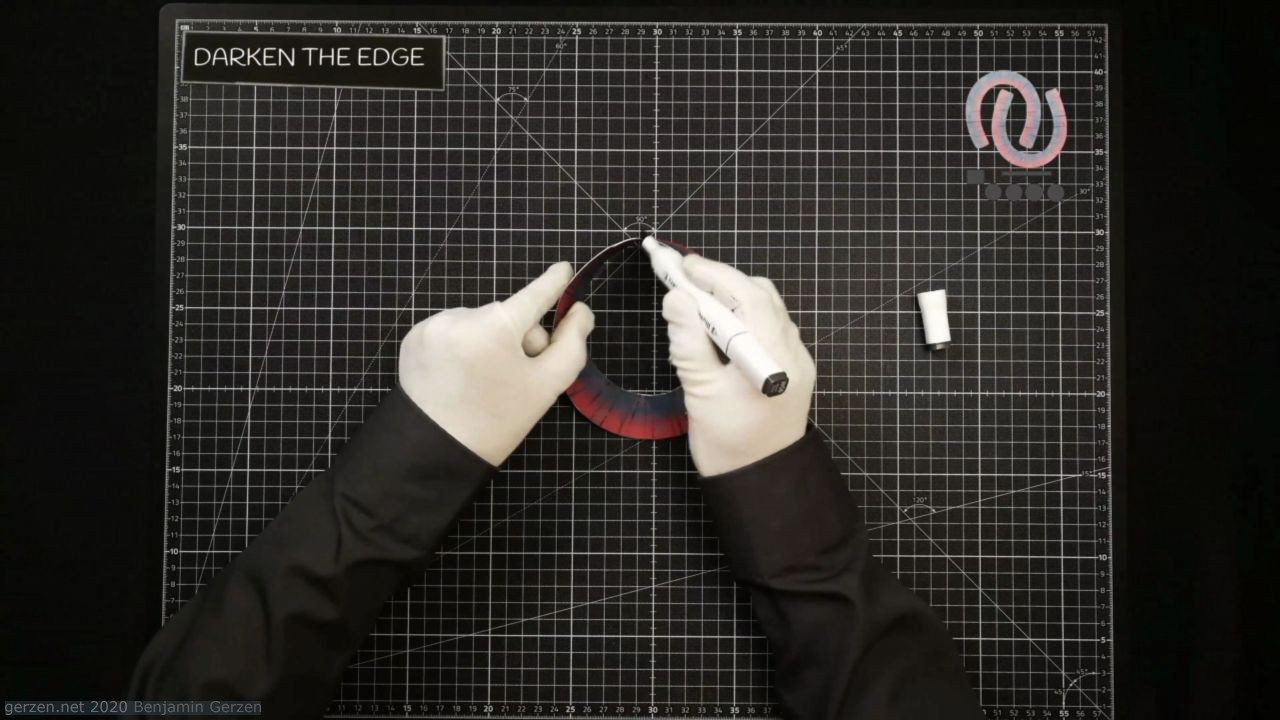
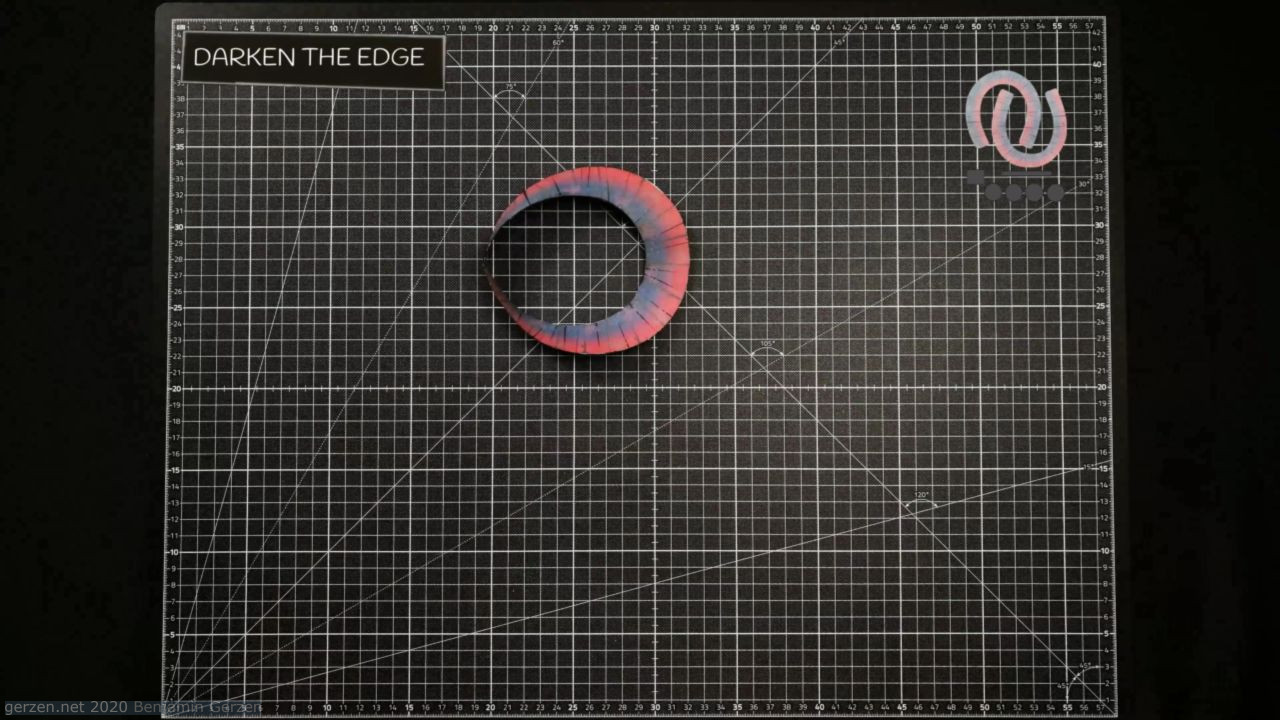
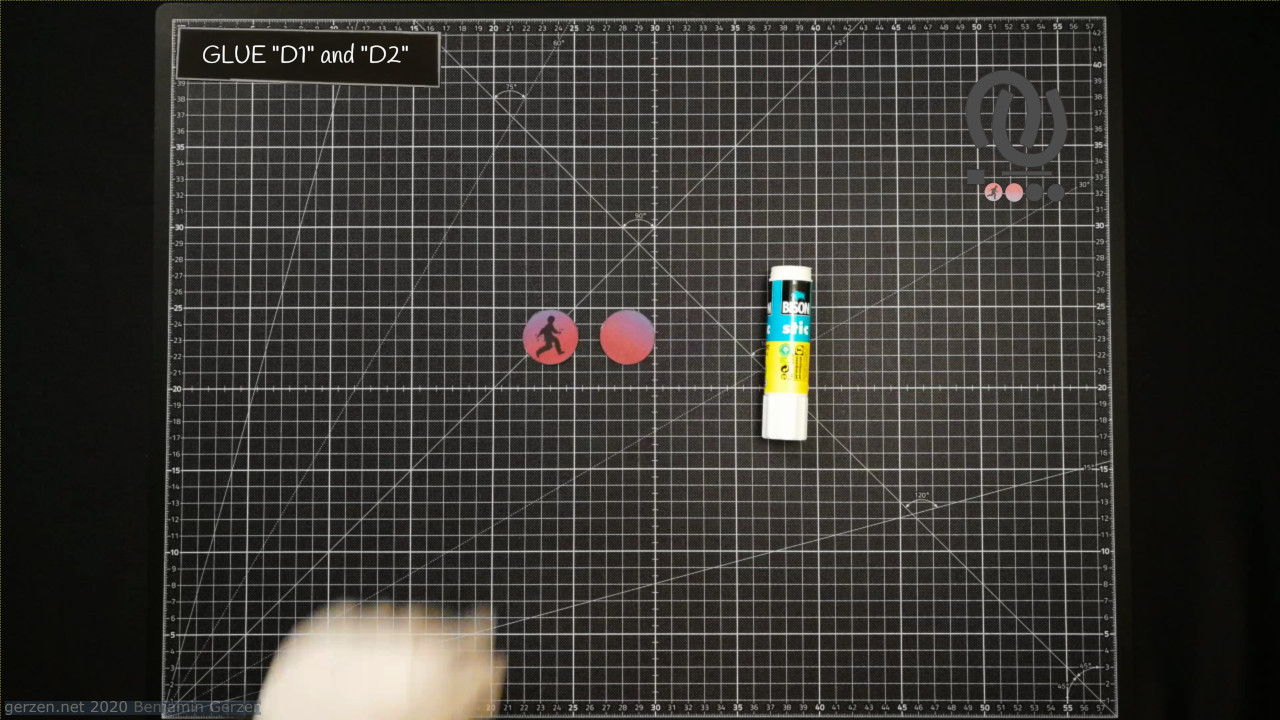
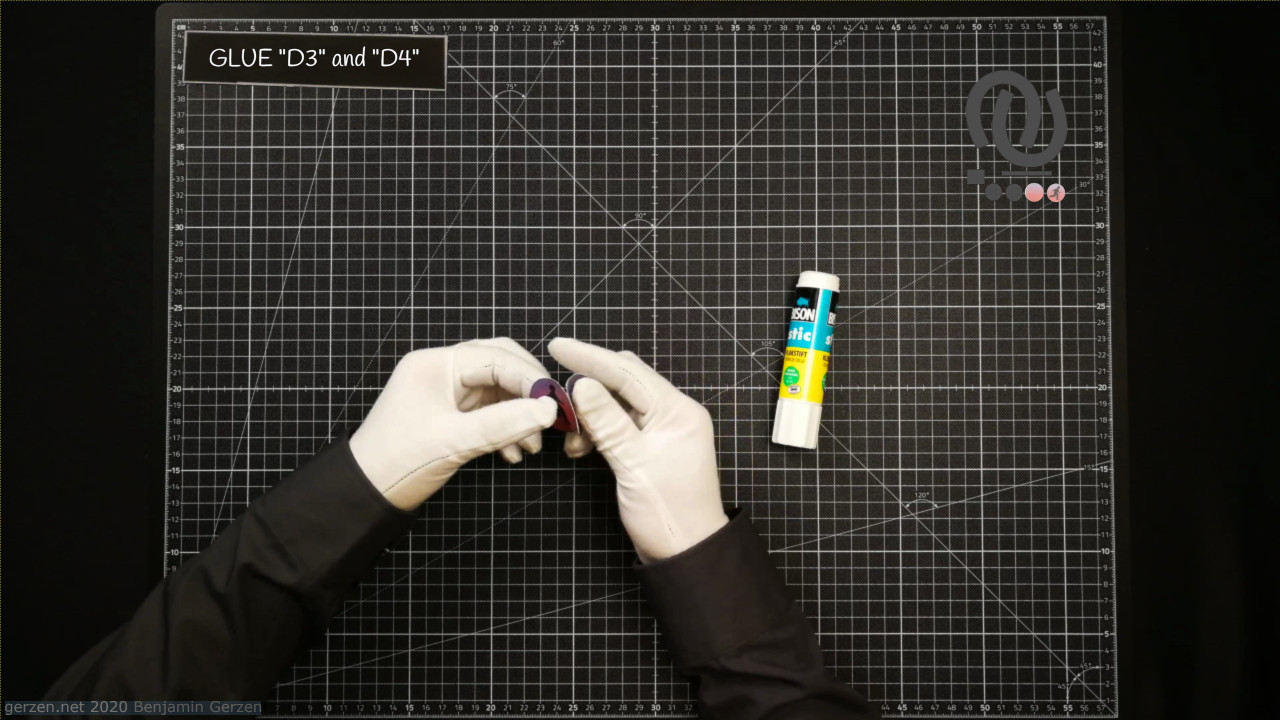
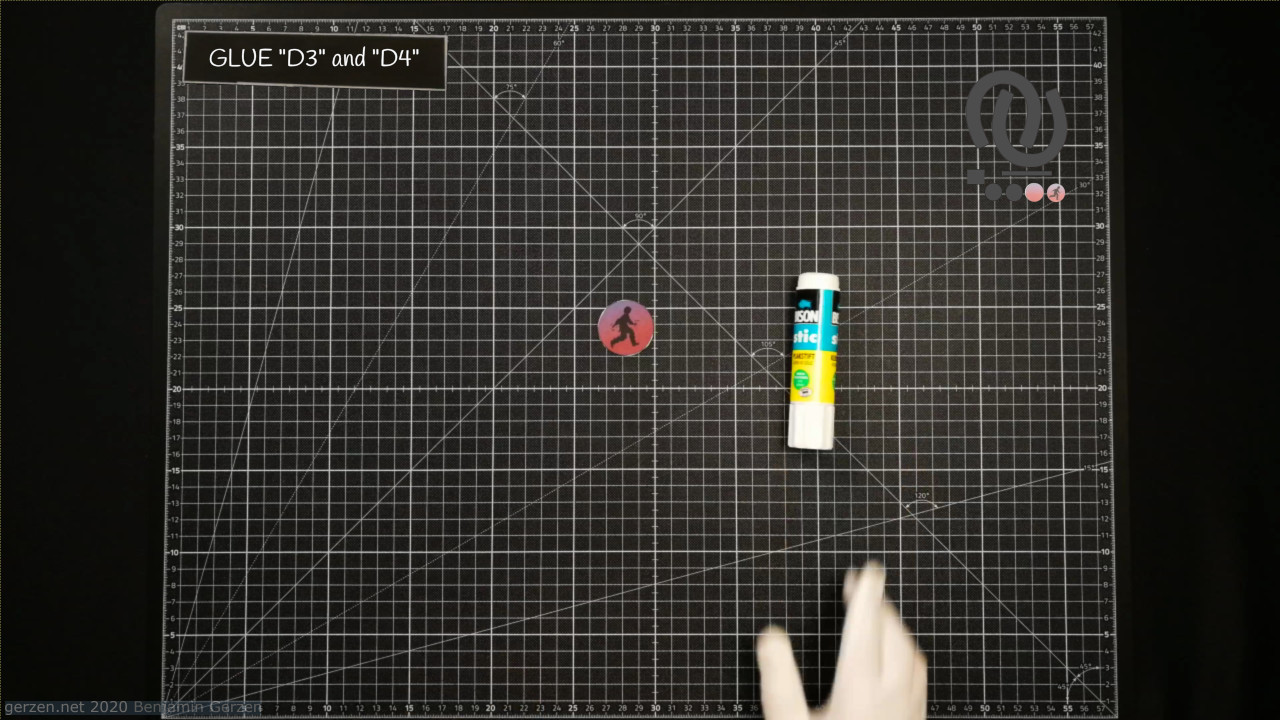
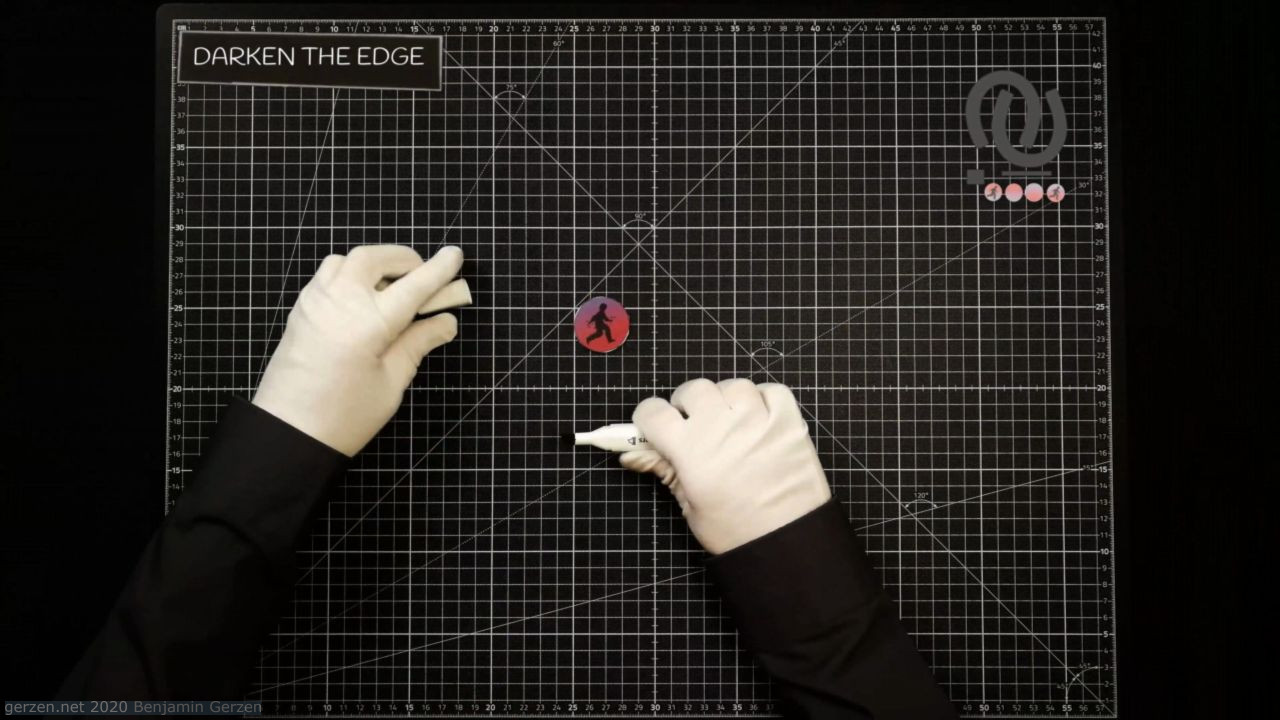
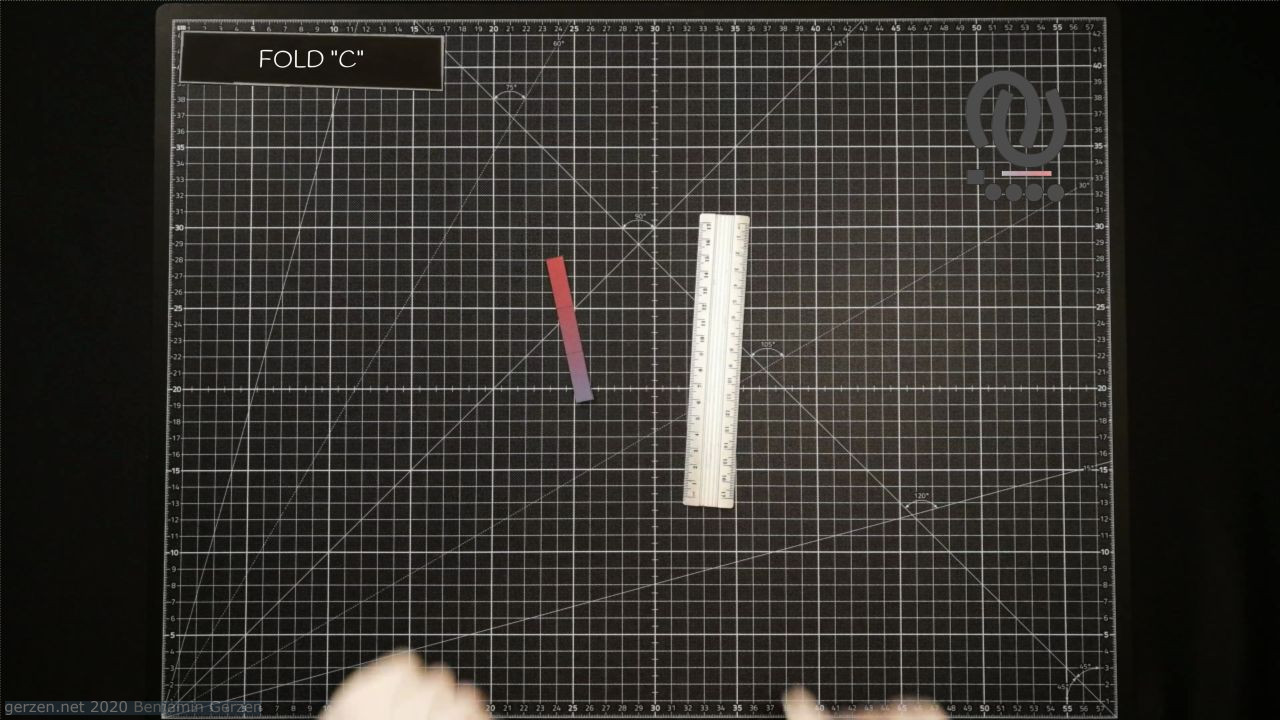
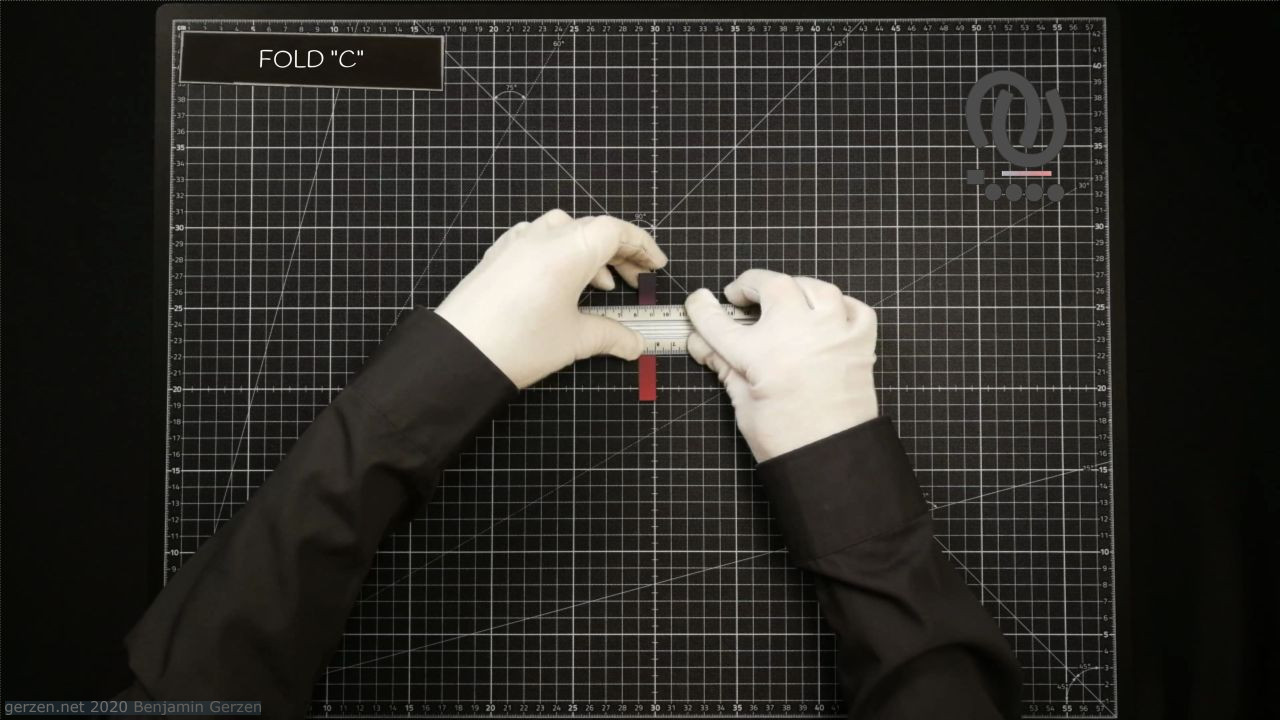
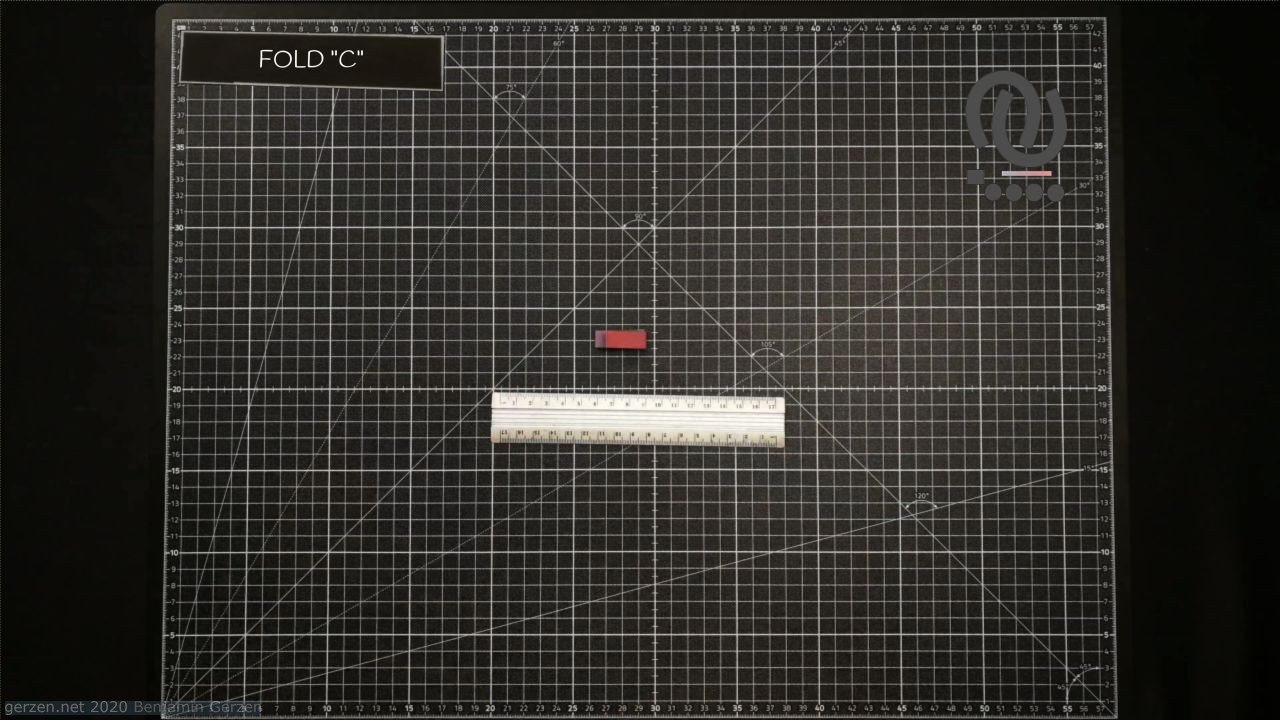
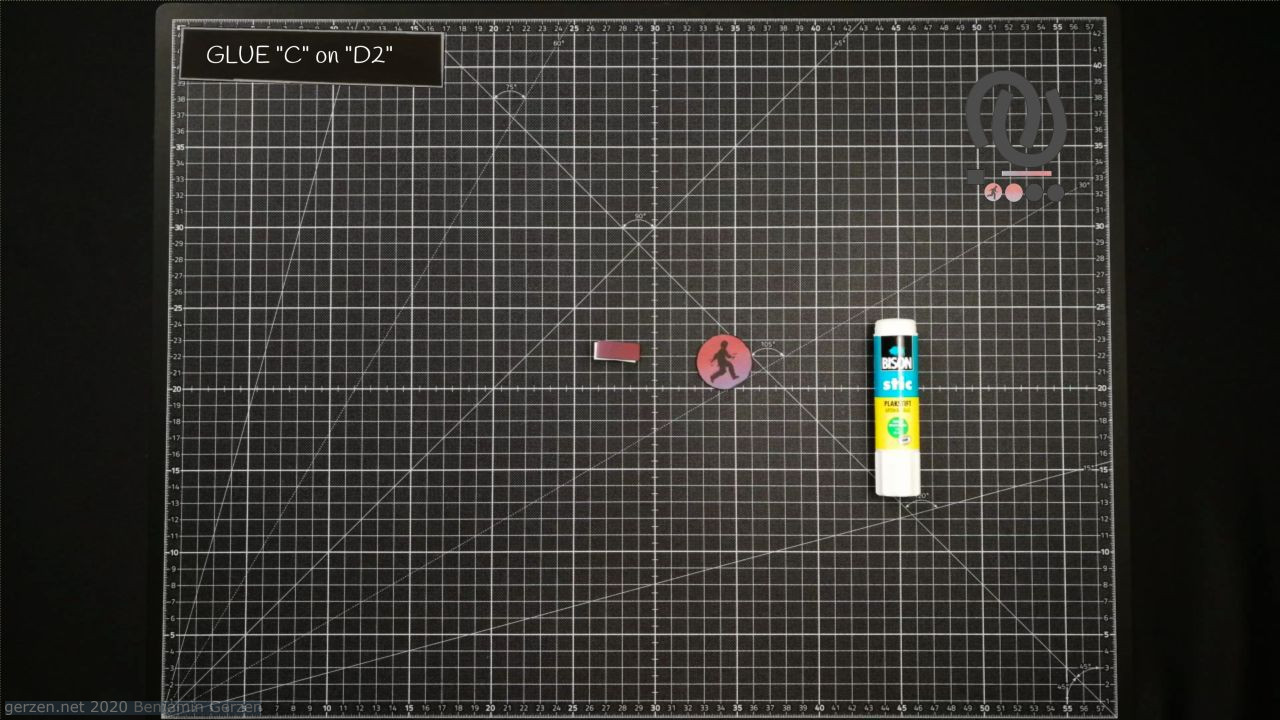
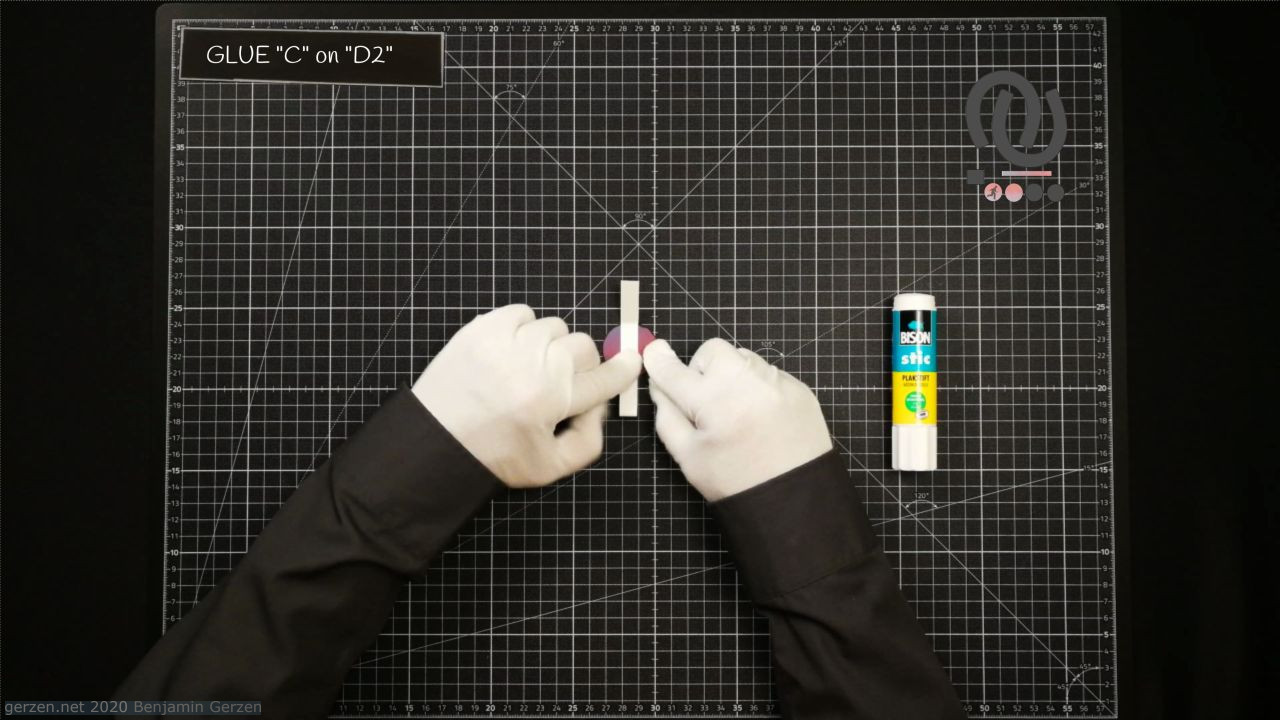
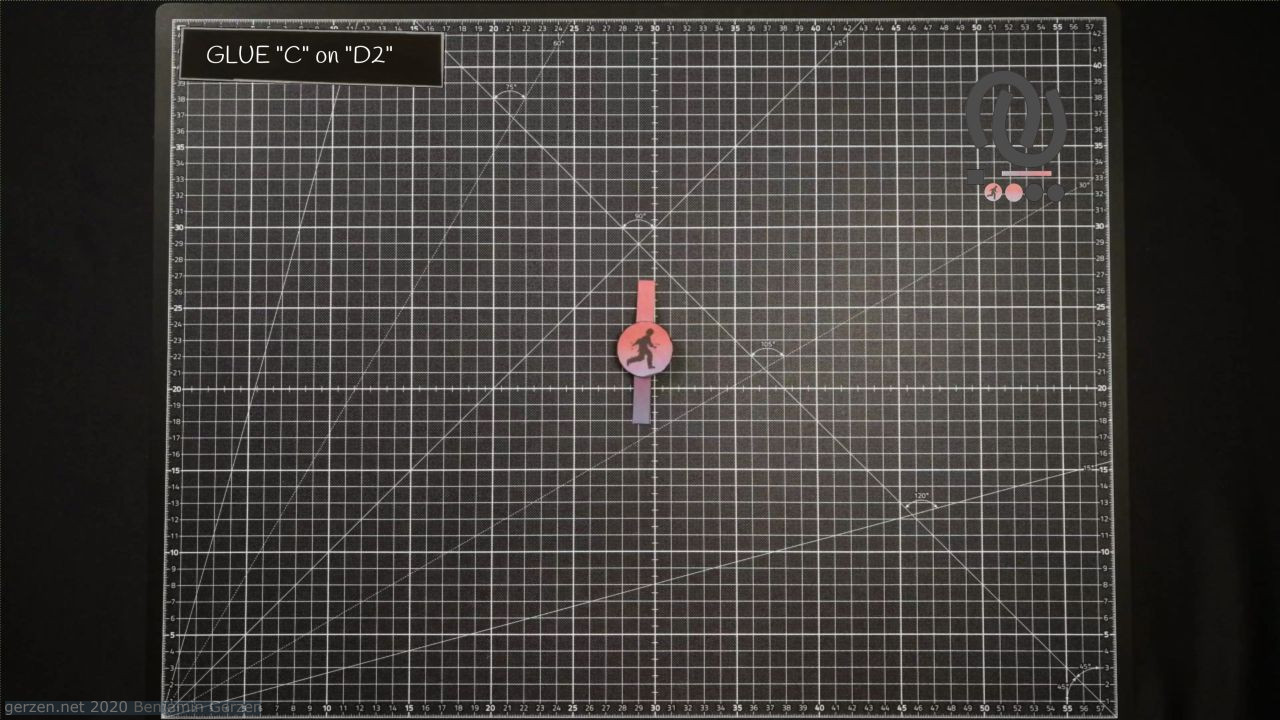
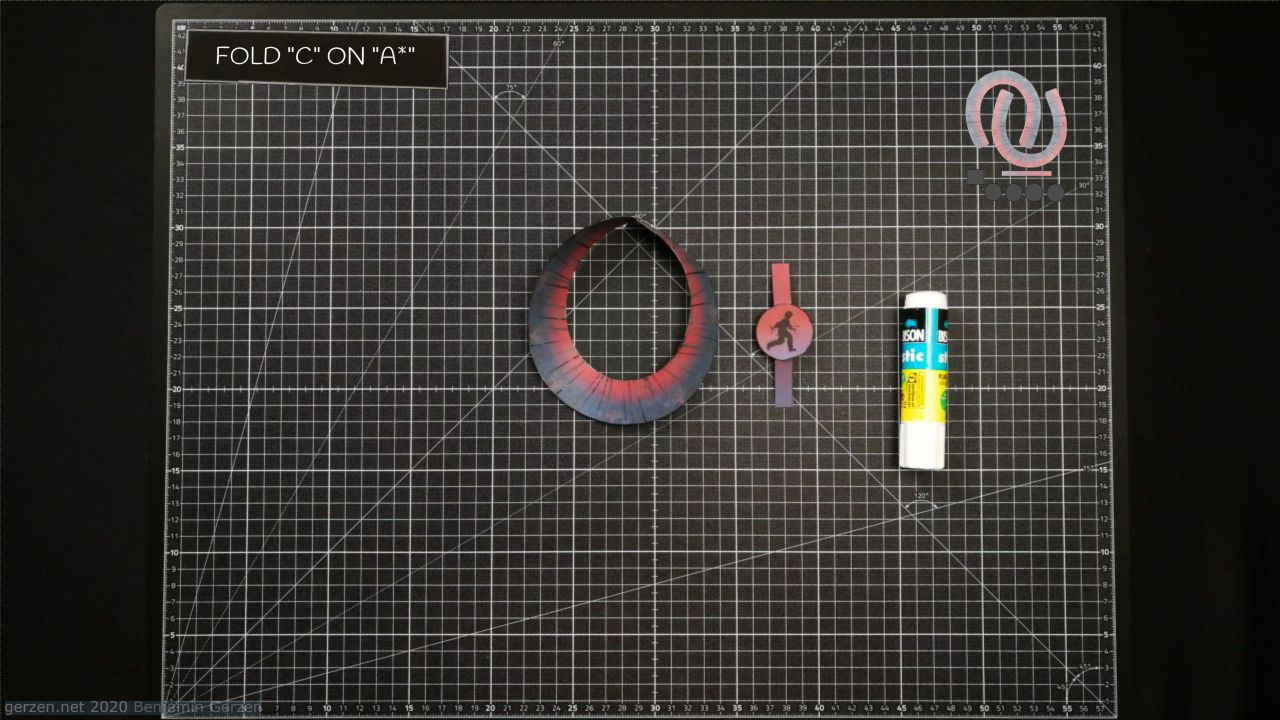
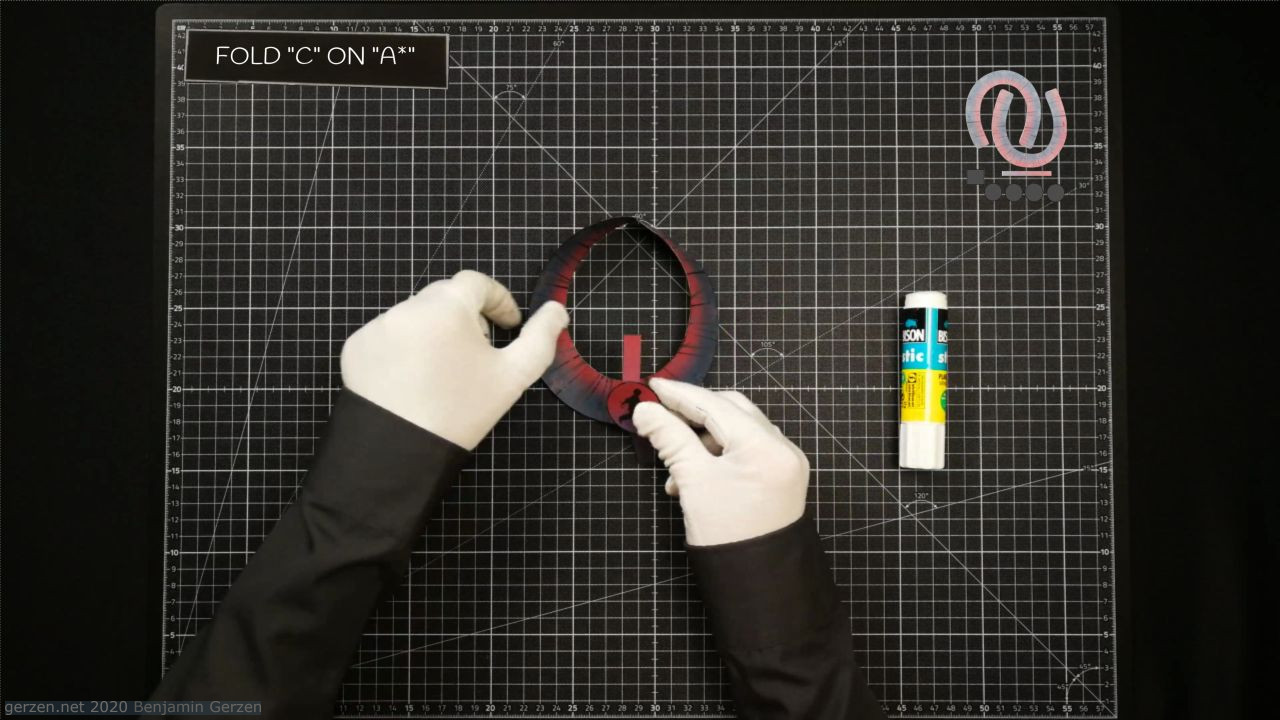
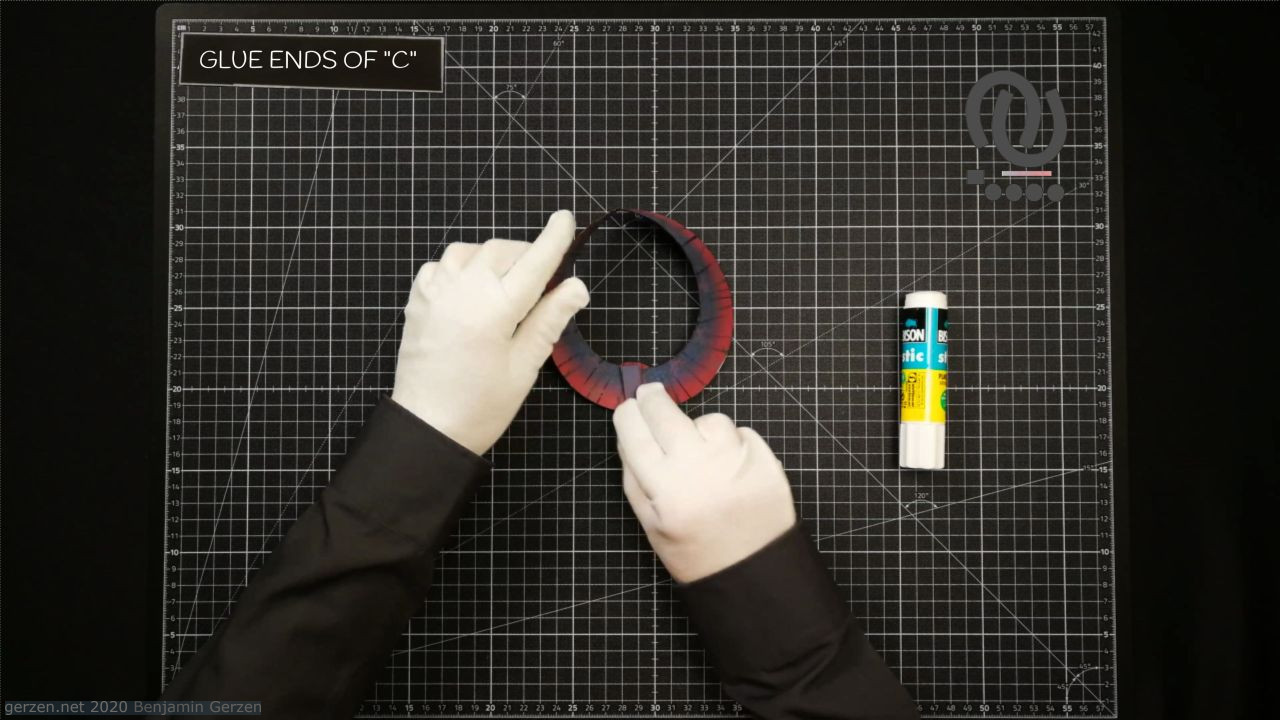
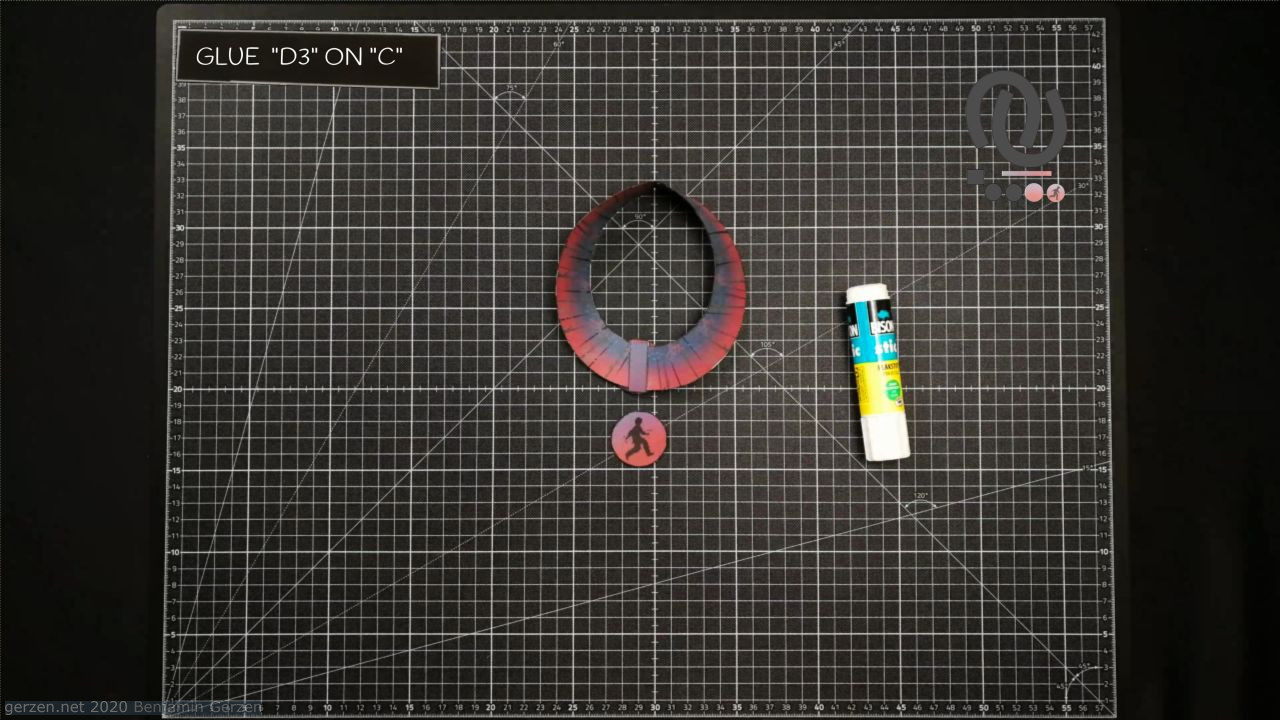
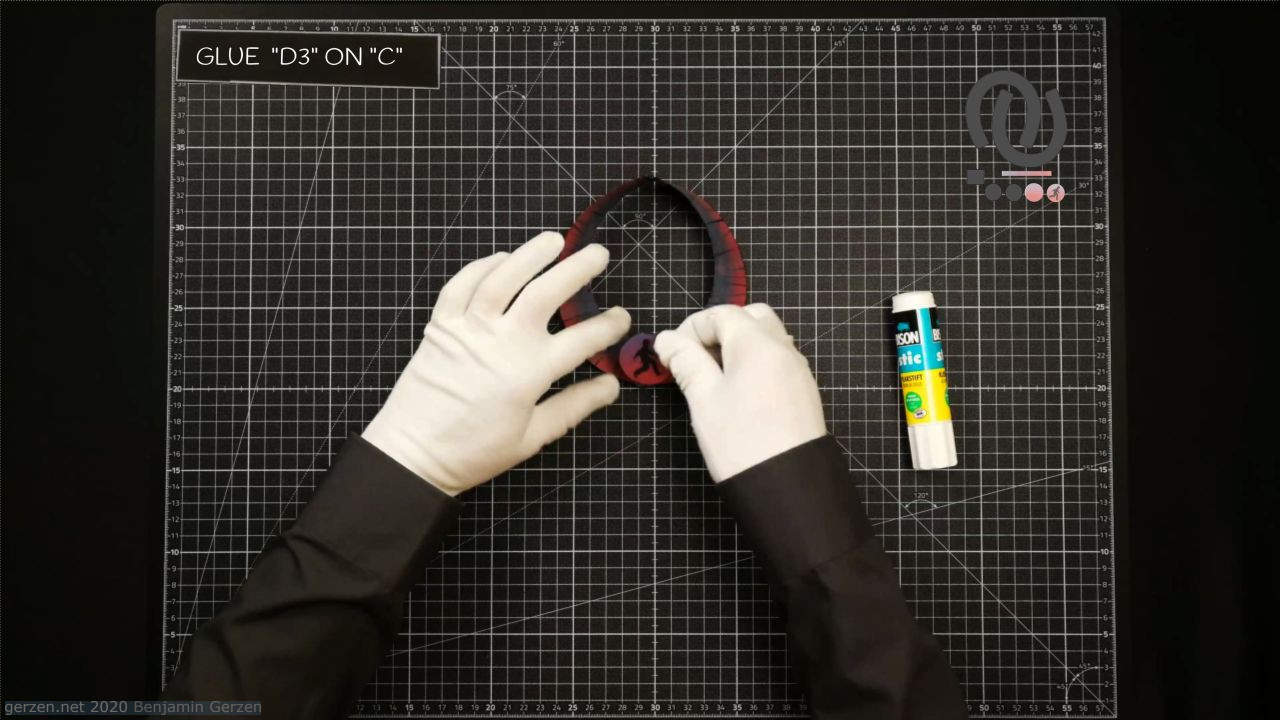
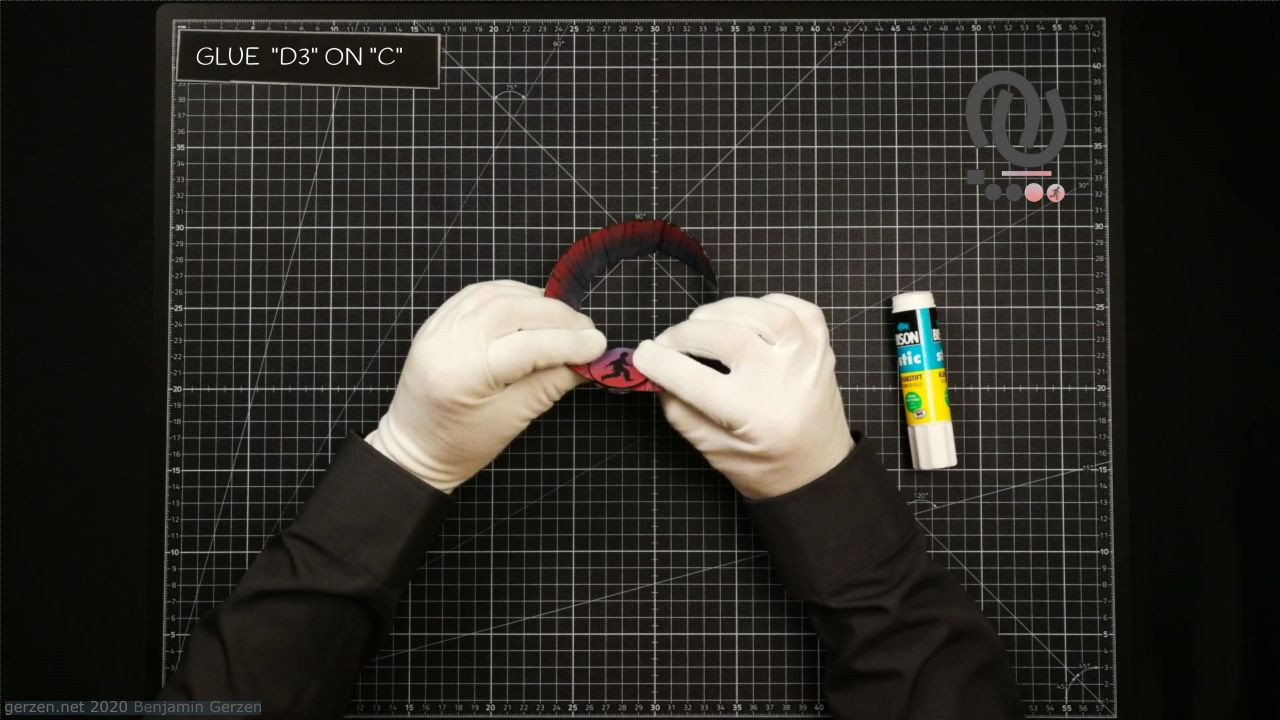
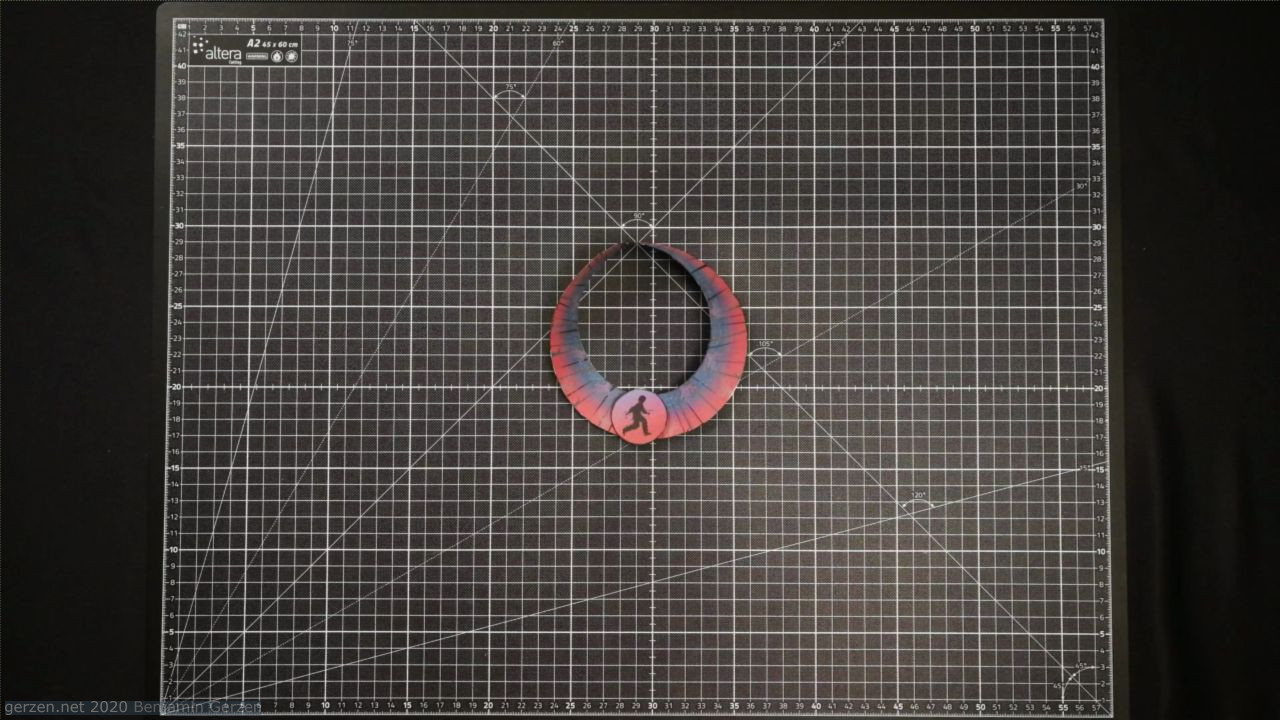
1: Let's prepare the necessary tools: scissors, glue, ruler, black marker and sandpaper. 2: Cut out all the pieces. 3: For aesthetical purpose, grind the protruding white edges in the ribbon and disk parts. 4: Overlay pattern "B" on "A1" and mark with a pencil the area that will be left unglued when gluing "A1" and "A2" in step 7. 5: Glue square "B" to "A1" so that half of the square extends beyond the edge of the ribbon. 6: Glue parts "A1" and "A2" together. 7: Intermediate result, parts "A1", "A2" and "B" glued together. 8: Cover the protruding half of part "B" with glue. 9: We turn both ends of the strip to one side ninety degrees 10: Like this. 11: Insert the protruding end "B" between "A1" and "A2" in the marked area. 12: Press the edges of the ribbon together and wait for the glue to set. 13: The classic Möbius strip is ready, half done. 14: Use a black marker to make the edges of the ribbon darker. 15: Möbius strip with colored edges - aesthetically looks better. 17: Glue "D1" and "D2" with the white sides facing each other. 18. Glue "D3" and "D4" together in the same way. 19: A finished disk with a drawing. 20: Use a felt-tip pen to color the edges. 21: Bend the "C" part with a help of ruler or another tool, e.g. an credit card. 22. First, with the white side facing in... 23: Then in the opposite direction, the painted side ends up facing the outside. 24: The "C" piece will be glued to the "D2" strip. 25: Apply glue to the colored side of the "C" strip and glue to the colored side of the "D2" disk. 26: Detail "D1″ glued to strip "C" 27: The "C" strip will be wrapped around the ribbon. 28: Wrap the "C" strip around the Möbius strip. 29: Glue the "C" strip into a ring around the ribbon. 30. Glue pattern "D3" to pattern "C". 31: Glue "D3" to "C". 32: Make sure that the "D3" piece is not glued to the Möbius strip. 33: Done. The runner is ready to move. 
 Download PDF